Powered By Blogger

About us

My photo
Hi welcome to our blog. Davinder and I are married and love all things textiles.We have a passion for pattern and have decided not to only make our products but share a bit about the things we love. We hope you get inspired and please leave comments we love to hear from you. Enjoy!! Davinder and Caroline

Friday 11 October 2013

Create with clay

I am doing a series of blogs heading up to 1/2 term to give you some great ideas of things to do with your kids. 
This is a great little project to do at the start of the week. You use air drying clay available at most good craft or art supply shops, it takes a good 48 hours to dry so plan do do this early in the week so that you can finish them with paint at the end of the week.

You will need:
Das Modelling clay in white 
Rolling pins but not your special home baking one just a cheap one for kids play dough etc!! 
Items to print with wood blocks, lace textured items.
Shape cutters
Paint
Varnish
Ribbon.

Make sure you put paper down and really keep everything away from your best furniture this can get a bit messy!
You need to add water to the clay to make it pliable, then roll it out and cut various shapes. 
We did lots of hearts and some stars and butterflies. 
Then we used various printing blocks and lace to add pattern. 
We have picked up lots of lovely Indian printing blocks on our travels but you can use all kinds of materials to leave an imprint on the clay such as leaves buttons jewellery chains etc..
Once you have made all your shapes make sure you have made an ideal hole for the ribbon to fit through once they are all finished.
Then leave them all to dry on a tray that you have protected with cling film or tin foil. This will take at least 48 hours but if you have your central heating on already maybe not so long! 
Once they are all completely dry you can get started with the painting. I tried to direct the kids with colour choice and got them to imagine that we were making them for a shop so needed to be beautifully made and painted.
We picked some lovely pastel colours we used gouache but you can use regular kids poster paint or household paint.

Make sure you paint the whole thing leave one side to dry for 30 mins then paint the back side in the same colour.
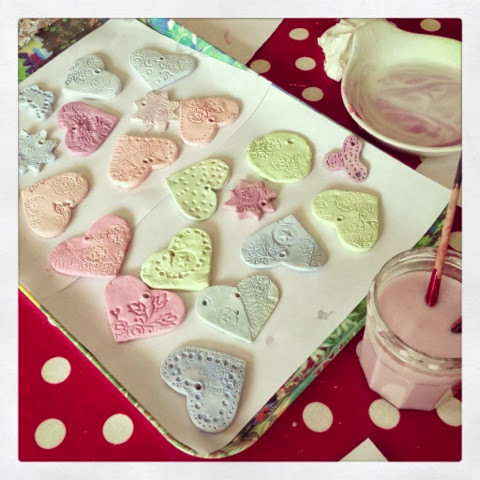
Leave them all to dry then give them a coat of matt varnish to give them a professional finish!
When they are all painted the wonderful patterns really stand out well. 

For the very finishing touches put ribbons through the holes in various colours and then you are all finished. You have some lovely hanging clay decorations that make a wonderful gift. 
The kids were so pleased with them that they even plan to send Daddy to work with them to sell for a £1 how industrious
Of them!  And Naomi has already given one to her teacher. 
 
You could make these for Christmas using lots of lovely bright red and white paint! Have a go with your kids I am sure they will love this craft. 
Happy creating and do comment and let me know how you get on creating with your kids. X
See you back here soon
Caroline x

1 comment: